Sunday, November 17, 2013

making small spaces work

We have a very small place. 5 people in 1100 square feet.  My goal lately has been to make spaces functional.  I have been making custom pieces to fit our lifestyle.  My boys share a room.  They are avid guitarists.  5 guitars and 3 amps.  Needless to say the room gets messy all the time because of the furniture they had and nothing fits.  I decided to make a custom piece that they could store the amps permanently out of the way.  I also decide to hang the guitars.  I changed out the dresser and nightstands.  Made custom boxes for misc. items
I changed out their long dresser for a thinner taller dresser to optimize space

custom boxes I made for misc. storage

custom boxes I made for misc. storage

custom boxes I made for misc. storage

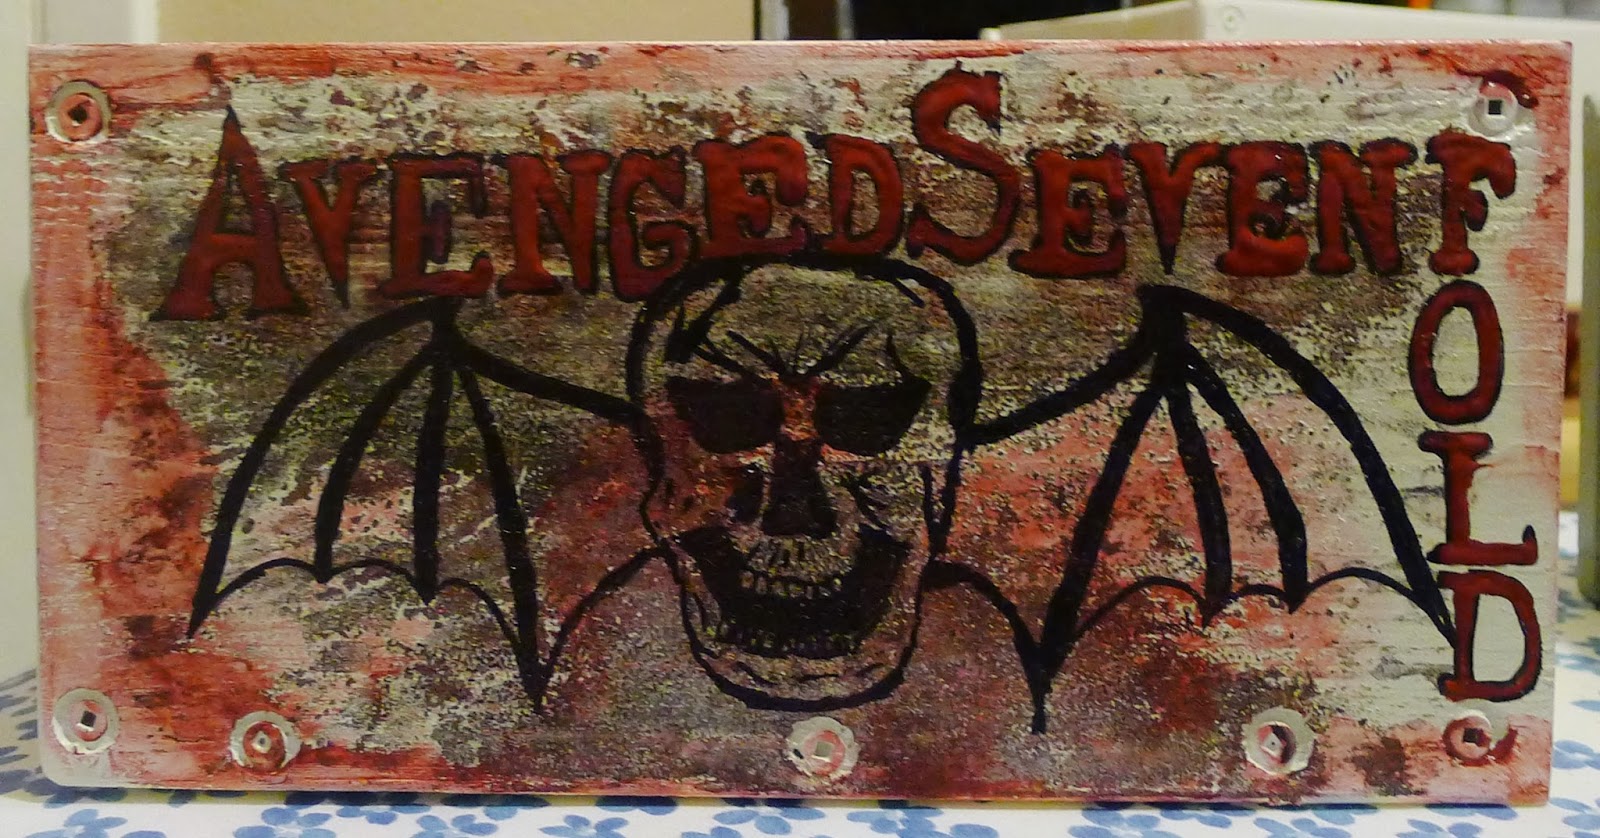
 have not completed all the storage boxes yet with their favorite bands

front view of the entertainment center

full view of the entertainment center
had to place 2 other  guitars in stands on the dresser


custom painted night stand

Saturday, April 27, 2013

Giving and old bed a new use

found this metal headboard at a thrift store for $10.00.  You should have seen me put it my car.  I thought a bench would be cute to make with it.  Now this was a simple project.  I did buy redwood so it would last.  The bench was $20.00.  (I have enough left over to make a small bench also with the leftover piece).  The 4X4 was also $20.00.  Long wood screws were used.  The tricky part was drilling through the metal of the bed frame.  My hubby added the stain and waterproofing.  I love it and it provides extra seating for my yard.  Total cost $50.00, but in the end I will get 2 benches out of it.  One larger 5 foot bench and the other 3 foot bench. Much cheaper and more sturdy than the ones you buy at the store. Thanks  Earl
before


after

after

Tuesday, April 23, 2013

I know I can use this for something

When I bought this at the thrift store for $5.00 I had no idea what I was going to use it for.  I only knew it had potential.  I painted it black.  I added a sign we already had to the top with a nail.  I then added long screws.  I covered the nails with electric tape to give it some cushion and to match the black shelf.  I then painted the head of the screws black.  That's it, only $5.00 for the shelf.  Eventually I need to make a wine rack
before

after


hanging above the bar

Monday, April 22, 2013

One man's trash is another mans medicine cabinet

I bought this at a thrift shop for 5.00.  I had to nail in some spots because the frame was coming apart, easy fix.  Now nothing was easier than this project.  Paint, hinges chicken wire and that's it.  I already had the supplies from a previous project.  Now my hubby has his own area. Total cost $5.00


before
after
area hidden, used hinges and a magnetic catch

Glass used to hold swabs

after

Friday, April 19, 2013

what a difference some paint makes

So I am slowly making it from one room to the next.  Every door is dark 70's brown.  It takes a lot of paint and primer to cover it.  Anyways no pictures before hand, but this is my newly painted bathroom with light doors now.  I love it.

newly painted bathroom

newly painted bathroom

This self I bought for .10 at a garage sale.  I painted it and added some chicken wire to keep the glass items in place

I love birds, my little towel holder

newly painted bathroom

newly painted bathroom
This something I added to my other sink area.  Its an apothecary jar I found at TJ max.  I added some organic soap by a company that is locally owned.  We need to support local business.  It smells amazing.

before light fixture
I had this piece of glass cut by Beehive glass.  They finished the edges and drilled the hole for me.  For me it was cheaper than buying a new light fixture.  Gives it a more modern look and I didn't have to install anything.  Total cost was $28.00


So I like green

Leave it up to me to have a rug inspire my newest project.  I love green so when I saw this rug of course I thought "Yep I'm going to paint my cabinet sink  cupboards green.  This project only cost me the paint, molding and of course the rug.  I started out with the ugliest cabinets ever.  1st step sand and clean cupboards (remove them first). 2nd step I glued wooden squares and molding I cut to size, let dry completely. 3rd step prime them, let dry.  I then added some black paint and again, let dry.  4th step add (what makes me smile every time I say it) Happy camper green paint.  I used 2 coats, let dry between each coat.  5th step I sanded edges and molding to let black paint show through. You can always add more paint if you sand too much. which I did to give it move depth.  I just wipe away any excess.  Its easiest for me to do this process with a craft sponge brush.  6th step add hardware.  7th step your husband laughs at you because you accidentally put the screwdriver in reverse.  Now my problem was I only had three matching cabinet knobs left so I had 2 brass knobs that matched.  I sanded them and spray painted them black and then once that dried painted again with 2 coats of metallic pewter.  I always like to add some feed and wax to the cabinets when I am done. Total cost molding $12.00, paint $14.00 and rug $30.00.  it's funny the rug was more than the cabinets, oh well
This is the drawer before

afterwards

after

after

the knobs that were originally brass

the rug insporation
what I started with


Sunday, April 14, 2013

Big Brass Beast

What is better than popcorn ceilings?  A giant brass, wood, ruffly glass ceiling fan.  That draws your attention to the popcorn ceiling.  Here is what I did to change the look of my ceiling fan.  1st I took of the arms and cleaned thoroughly (Gross by the way).  2nd I painted the faux wooden blades with a black/gray color with 3 coats.  3rd I painted the brass arms with layers of paints and I just used craft paints.  I started out with a bronze, then pewter, black, copper, then pewter again.  I was going for a rubbed bronze look.  4th I did the same with the fixture on the ceiling.  I am so lazy I didn't mask off anything.  I managed not to do to bad.  I then put everything back together. Added some glass fixtures I bought at a thrift store for $1.00 each.  I already had the paint so total cost $3.00
Oh all the shiny gold
faux wooden blade


after


after
after